LaunchFlows Quick Start Guide
Overview
To get started with LaunchFlows please first install the following plugins:
- WooCommerce
- Elementor
- LaunchFlows
If you do not already have one, please create a simple product in WooCommerce.
Now you are ready to start customizing your WooCommerce checkout experience with LaunchFlows. When installed, LaunchFlows adds two new widgets to Elementor:
- LaunchFlows Components
- LaunchFlows Style Manager
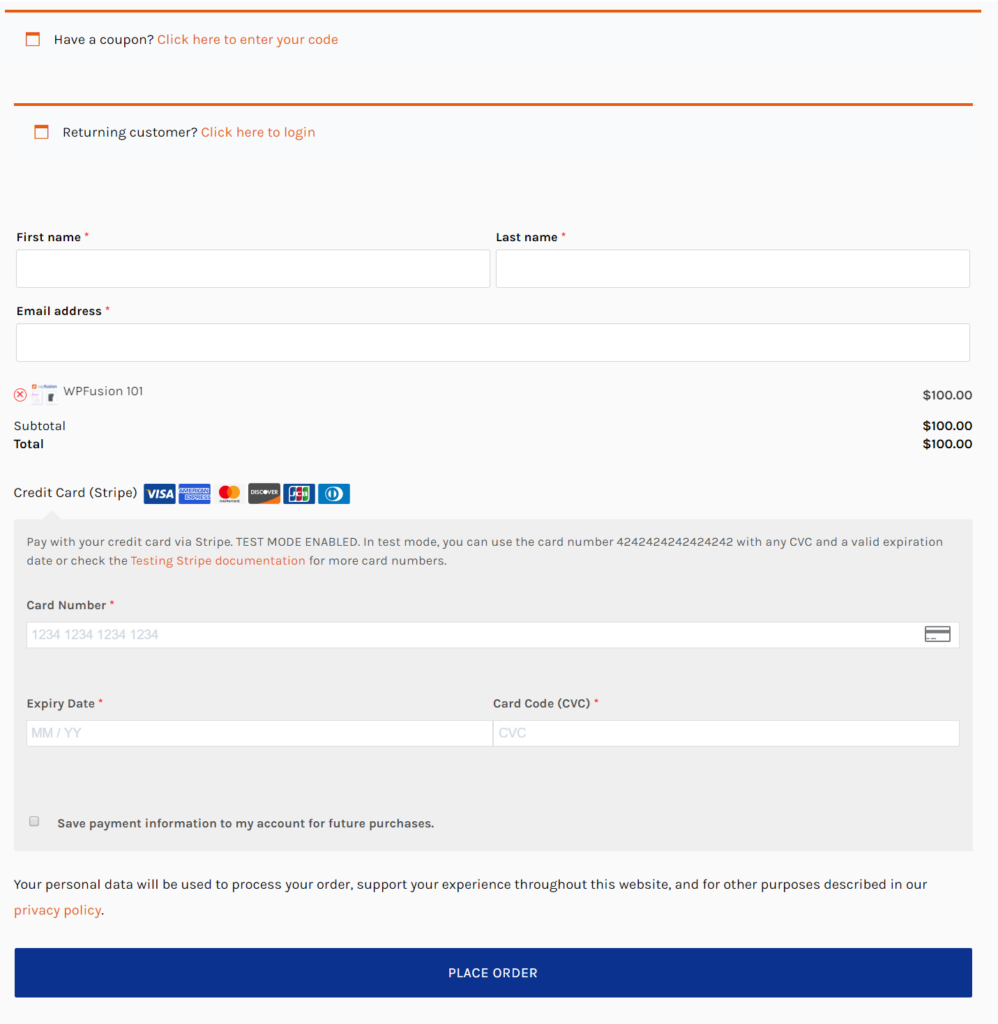
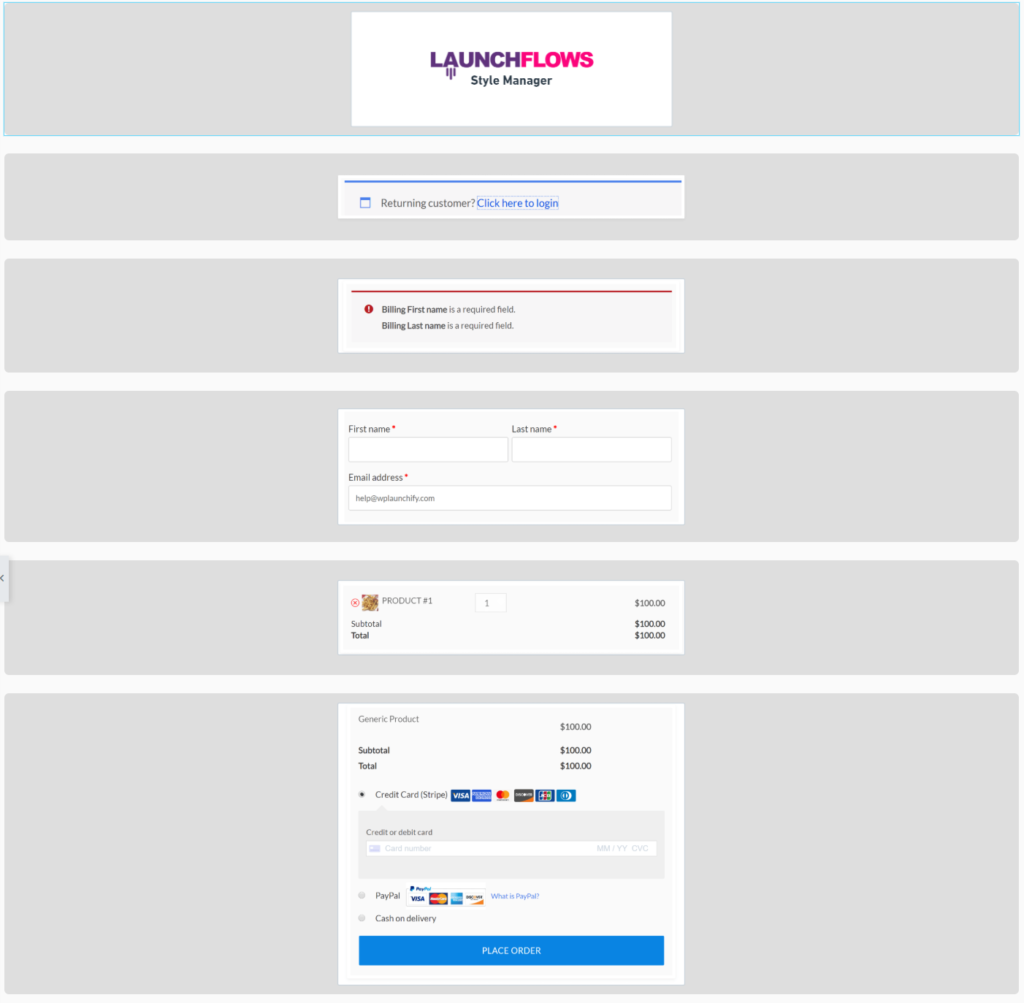
LaunchFlows Components consists of the individual elements that make up a WooCommerce checkout (Billing Fields, Payment button, Order Review, etc.) and special additional functions that allow for further customization of the checkout experience.
The LaunchFlows Style Manager allows you to tweak the design of the individual LaunchFlows components just like you would with any other Elementor widget.
With LaunchFlows, you can create as many unique Checkout Experiences as you like. There are four basic steps to get started.
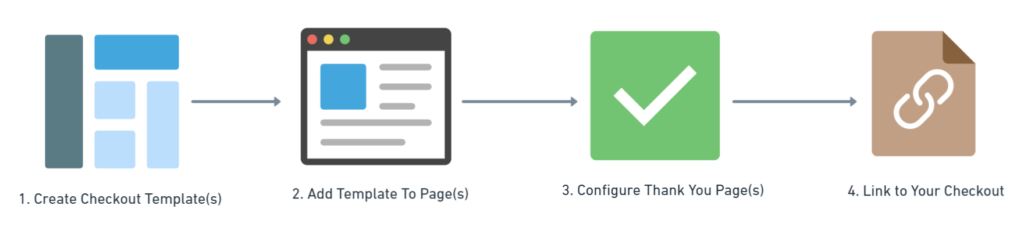
1) Create Checkout Template(s)
Custom checkout templates are created via Elementor Templates by utilizing the LaunchFlows Components widget. Each component can be styled using the LaunchFlows ‘Style Manager’.
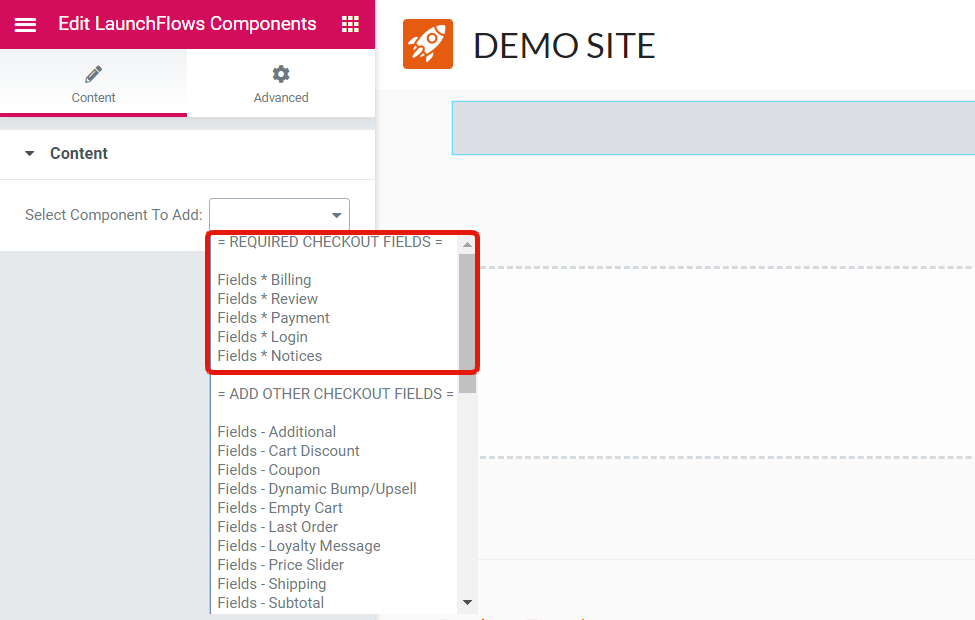
Add all of the ‘REQUIRED CHECKOUT FIELDS’ to your page to get started.
2) Create Checkout Page(s) and Assign the Template
Any WordPress page or post can become a checkout by simply adding the WooCommerce checkout shortcode and selecting the LaunchFlows checkout template from the dropdown.
You can create one global checkout template for all of your products or unique templates for each.
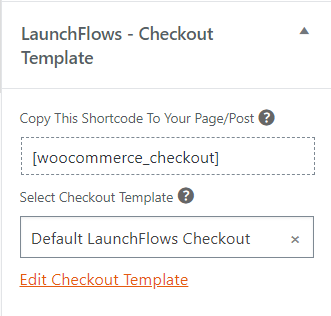
Leave blank to use the global WooCommerce checkout page (set in WooCommerce -> Settings -> Advanced).
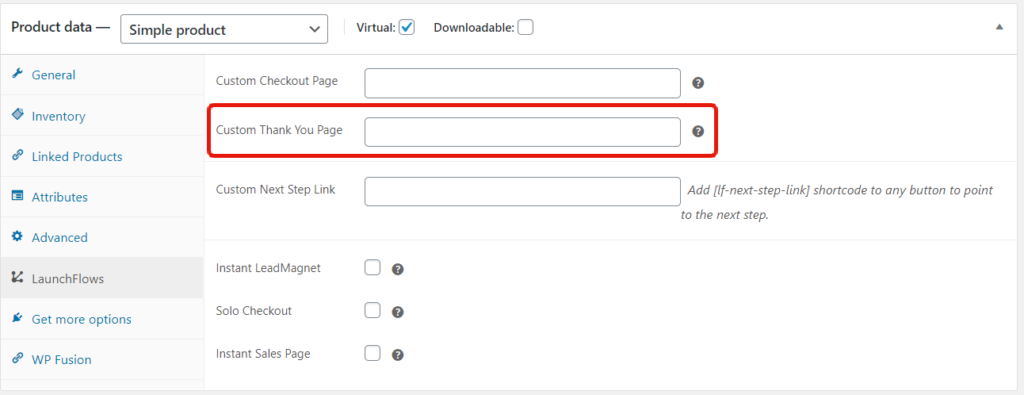
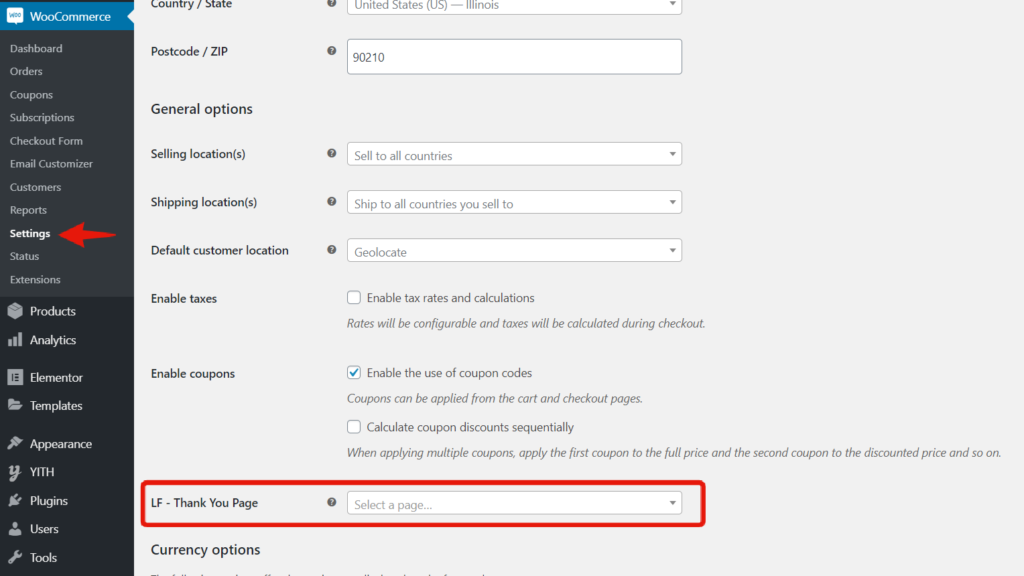
3) Create Custom Thank You Page(s)
This can be designed any way you like with Elementor. Thank you pages can be configured per product or set globally.
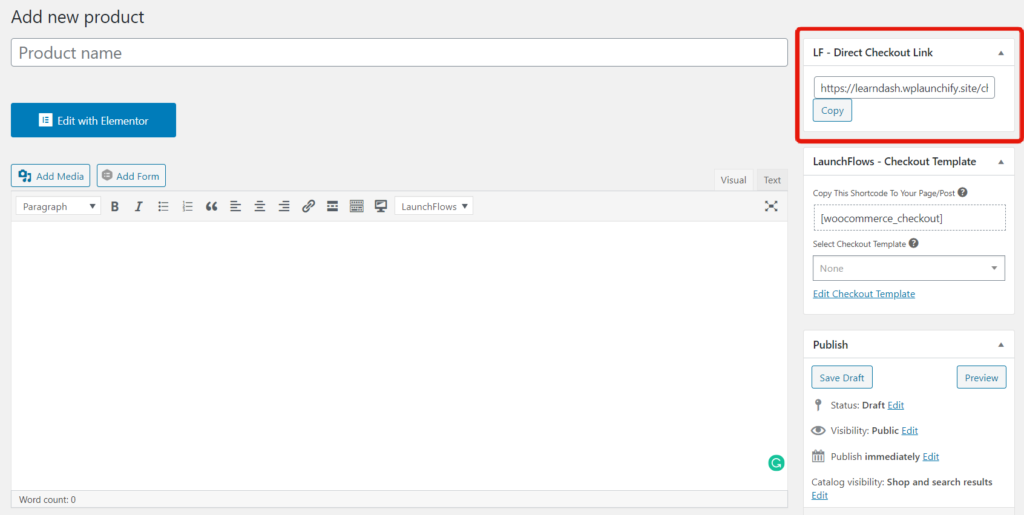
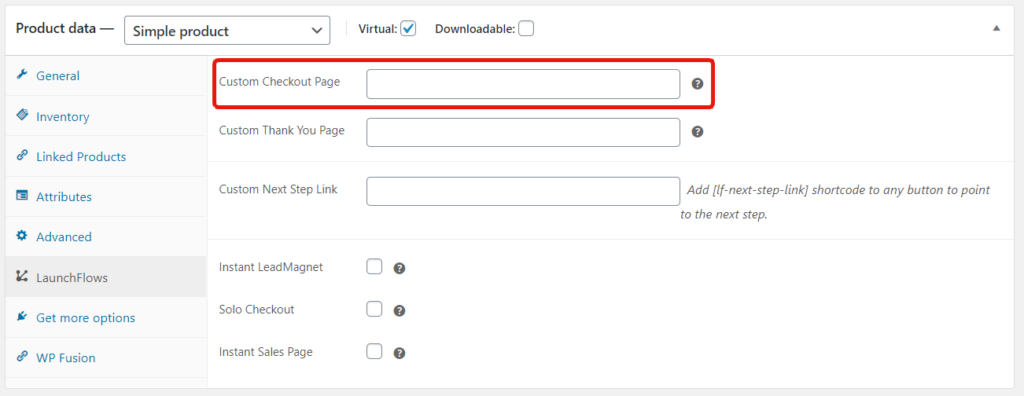
4) Add Products to Your Checkout Using The ‘LF Direct To Checkout Links’
Direct to checkout links can be used on your sales pages, social media or anywhere on the web. They will instantly add the appropriate product to your checkout.